Friday, February 1, 2013

Throwing a birthday party on a budget

Our little boy is turning one! Strange as it may seem, there was a part of me (OK, let's be real - the whole me) that thought this day would never come. That our little man would stay little forever. Denial? Perhaps. Well, earth-to-mom - time only starts moving faster after having kids.

After I got over the initial shock that this day was indeed upon us, it was onto the fun part - planning a memorable (and inexpensive) get-together to celebrate Will's big day. I wanted to keep it low-key and fun - aka. not turn it into an overly orchestrated Martha Stewart-esque party that would stress me out - but in typical fashion I needed to let the creative wheels turn at least a little bit. My goals with the party were 1) fun for Will and the attending kids, 2) fun for me to plan and not too much work and 3) of course, cheap!

I'm happy to report that the party was all of the above and more. It was one of those special days that we'll never forget (especially not with all the photos snapped and videos taped), and it was relaxed enough for all of us to enjoy it - including the birthday boy and mom. From budget to decorations to - of course - the cake, below are what I hope are helpful tips on how to throw a fun and frugal birthday party.
    Timing: Less is more. We hosted our party from 1:30 - 3:30 and that allowed us plenty of time to enjoy the moment and then wrap things up before the kids got too tired. The timing fit with Will's nap schedule and that of his friends (although it's impossible to accommodate everyone), and also meant that we wouldn't need to do lunch (thus saving money and mommy's sanity).
      Invitation List: Who to invite? For a few days I had flashbacks to the lengthy process of putting together our wedding guest list and felt like I needed to check myself into a 12 step program for the decision-making impaired. But seriously - where do you draw the line? Do you invite friends from school? His or her teacher? Your friends both with and without kids? The answer is going to depend on your individual situation and I say go with your gut. I erred on the side of small and simple and we ended up with two families attending (though I invited and planned for five - January is apparently a challenging month to throw a kids' party) and his school teacher. It was the perfect size. (After the fact, my mother-in-law told me a good rule of thumb for planning kids' birthday parties: the number of kids invited should be close to the child's age plus one. So, for instance, you should invite three kids to a birthday party for a two-year-old.)
        Budget: I gave myself a $100 budget to throw the party and made it work. How did I do it? Here is the breakdown.

        $20 for invitations and postage
        $50 for food and drinks
        $20 for decorations, activities and plates/cups
        $10 for goody bags

        Food and Drink:
          Cake: A few months back I found a mold for a giant cupcake at a garage sale for $1 and snagged it knowing it would be perfect for his first birthday party - and many a bake-sale in our future. I made a yellow butter cake ($2 mix) with homemade strawberry filling ($3), cream cheese frosting ($2) and sprinkles ($2). While I considered making the cake and frosting from scratch, considering my track-record when it comes to baking I decided to push the 'easy' button and buy cake mix and ready-made frosting. Don't have a giant cupcake mold? Make regular cupcakes - they're inexpensive and the perfect size for both kids and adults. (Tip: I discovered that you can use a turkey-injector to put filling in the middle of cupcakes - just make sure the filling has been thinned in your food processor and inject the cupcakes before you frost them. Score!)

          Food: I easily could have gone overboard here and had to reign myself in a few times. I made three types of tea sandwiches that were also kid friendly - hummus and roasted red pepper on wheat ($5), cheese and fig spread on wheat ($8), and cucumber, cream cheese and dill on white bread ($5). Other than that, I kept it really simple and put out some cheese cubes ($2), grape tomatoes ($3) and chips ($2). After all, what guests are really looking forward to is the cake.

          Drinks: We got a 12 pack of beer ($12), apple juice ($2), ginger ale ($1) and sparkling water ($2). We avoided drinks with bright colors, thus no worrying about stains on the carpet.

          Decorations: This is a flexible part of the budget because you can do as little or as much as you want - for me, this is where I wanted to have a little fun. I bought the necessities (plates for $3 and napkins for $2), hats ($2), balloons ($5 filled), and a cute felt 'Happy Birthday' sign at Target for $5 (there is no way I could have made that for less).  To add a little extra pizazz, I made and hung tissue paper pom poms around the house for a grand total of $4 (really, more like $2 as I didn't use all of the paper).
                Kids' activities: Keep it simple! I had some crayons and paper as back-up, but didn't need them as cake and the opening of presents offered plenty of excitement.

                Goody bags: I certainly didn't need these for a first birthday party, but found some cupcake themed goody bags on sale at World Market for $2 that I couldn't pass up. I added some rubber duckies for $1 a piece and voila - done.

                Planning: This is my type A personality talking, but I found it helpful to spread the to-do list out over the week so that I didn't feel overwhelmed come Friday/Saturday. As in decorate house on Wednesday, make grocery list on Thursday, shop and bake cake on Friday, etc. A little forethought here went a long way because Lord knows life is unpredictable with a soon-to-be one-year-old!

                Video and Photos: Get some help here! You simply can't do it all and play host at the same time - not to mention that the guest of honor is going to need a lot of your attention throughout the whole party. Ask two friends or family members to help with photos and video and let them know what you want them to capture - like your little one stuffing cake in his or her mouth (or eating crumbs off the floor...just saying...) or ripping up wrapping paper.

                Have fun! Above all, once the day arrives go with the flow and don't sweat the small stuff. The most important thing is to enjoy the company of family and friends and help your little one feel at ease. The more relaxed you are, the most relaxed everyone - including the birthday boy or girl - will be.

                Being new to kids' parties, I'd love to hear other ideas for budget-friendly birthdays. From food to themes to cake to activities, please chime in with your comments!

                Friday, January 11, 2013

                How my slow cooker got her groove back

                On our first Christmas together as Mr. & Mrs., my husband and I received a slow cooker from his parents. While some daughters-in-law might take this as a not-so-subtle 'hint,' being a bit of a geek in the kitchen I couldn't wait to take her for a test drive. I dreamed of tasty, tender beef falling off the bone, hearty stews that begged to curl up with crusty bread and soups and sauces to warm our hearts and bellies all winter long.

                What I got on my first few tries were bland, watery excuses for dinner that bordered on inedible. Oh, and I cracked the crock insert within a few weeks of receiving it. Not exactly a winning start to my relationship with my slow cooker.

                She went back into the box in the spring and collected dust while we turned our attention to cool, colorful salads and let our grill take center stage during the hot summer months. The following winter, armed with tips on how to make slow cooker dishes that are actually appetizing, I dug my no-longer-shiny-and-new appliance out from the garage and gave her another whirl. And wouldn't you know it? My slow cooker had gotten her groove back.

                Especially now that we are mindful to make the most of every dollar, my slow cooker plays a prominent role in our weekly meal planning. Using this kitchen workhorse on a regular basis has not only allowed us to take advantage of inexpensive cuts of meat like roasts and ham hocks, but reduced our electricity bill as we use the oven less. (Our oven is electric, though we dream of gas. Each time we turn it on it costs us at least $1-2 in electricity.)

                Should you have a slow cooker that smells more like moth balls than beef bourguignon, here are some bits of advice on how you too can rekindle your love for this trusty kitchen appliance.

                • Brown your meats: Yes, it takes time, but you'll have better results if you do this step prior to placing meats in the slow cooker. Browning on the stove helps the cuts retain their juices and gives the dish more flavor. An exception is the recipe below, in which you basically throw a whole chicken into the slow cooker and let it work it's magic.
                • Don't start with frozen foods: This is how we cracked our first crock. Learn from our mistake.
                • Resist opening the slow cooker while it is cooking: Don't let the heat escape! Let your slow cooker do it's job and enjoy the mouthwatering aromas in the meantime.
                • The liquid ratio is key: Because there is nowhere for steam to escape, your slow cooker retains all of the liquid from a recipe's ingredients. While this can be fantastic for meals like the chicken below, it can be disastrous if a recipe calls for too much broth/water/etc. I err on adding less at the start - you can always add more later if the dish needs it.
                Below is what has become my favorite, go-to slow cooker recipe. It is easy, inexpensive and absolutely delicious. Enjoy!


                Braised chicken with salsa verde
                From The Italian Slow Cooker, by Michele Scicolone
                Serves 4

                4 large potatoes, thickly sliced
                2 carrots, thickly sliced
                2 cups 1-inch cubed butternut squash (I should mention that we use whatever veggies we have around - squash, carrots, onions, celery, parsnips, etc. The key is slicing/cubing them thickly.)
                1 large onion, sliced
                Salt and pepper
                1 4-lb chicken
                1/2 lemon
                4 garlic cloves
                1 sprig rosemary

                Scatter the vegetables at the bottom of the slow cooker. Sprinkle with salt and pepper to taste. Remove the neck and giblets from the chicken along with any excess fat. Reserve giblets for stock.
                Sprinkle the chicken inside and out with salt and pepper to taste. Place the chicken in the slow cooker and squeeze half a lemon over the top. Place the lemon half, garlic and rosemary inside the chicken. Salt and pepper the top of the chicken.

                Cover and cook on low for 5 hours, or until the chicken is cooked through and the vegetables are tender. Remove the chicken skin before serving.

                Salsa Verde

                2 1/2 inch thick slices of Italian or French Bread, crusts removed
                2 cups packed fresh parsley
                1 garlic clove
                4 anchovy filets (we have never used these and I don't miss them in the slightest)
                3/4 cup olive oil
                2 tablespoons fresh lemon juice
                salt & pepper

                Soak the bread in warm water for 5 minutes. Drain and squeeze out most of the liquid. In a food processor, combine the parsley, garlic and anchovies (if using) and process until finely chopped. Add the soaked bread. With the machine running, drizzle in the oil and lemon juice. Add salt and pepper to taste.

                Cut the chicken and serve on top of the vegetables. Top with the salsa verde. Leftover salsa verde can be used throughout the week with fish, as a spread for bread, etc.

                Tuesday, December 25, 2012

                Christmas 2012: Temporary Insanity and Peppermint Bliss

                It all began with a simple question from my son's teacher at school -

                "Would you like to help us with the Christmas costumes for the infant and toddler classes?"

                Weeks later - surrounded by onesies, tulle, and felt, frantically sewing what would be peppermint costumes for eleven children - I had to laugh at my ability to volunteer for projects that can't help but spiral a bit out of control.

                While there were more than a few moments I wondered at my sanity in taking on such a big commitment right before the holidays (which, at least in our household, is both the merriest and busiest time of year), the truth is that I love projects where I can be creative and help others. Figuring out how to make costumes that were cute and festive on a budget - and perhaps most importantly, EASY - helped to get me in the Christmas spirit (well, that and the big glass of wine I poured to celebrate when the last peppermint was complete).

                Should you ever find yourself saying 'yes' to crafting Christmas cosumes for a class full of children (or just you own), here are some simple instructions on how to make peppermints for less than $1 a piece. Merry Christmas!


                Materials
                Red, green and white felt (I made red peppermints for the girls, green for the boys)
                Tulle
                Glue
                White thread
                White onesies or t-shirts (nearly every child out there has an old one to donate to the cause)


                1. Cut a white felt circle for each peppermint about the width of a onesie. I used a medium sized bowl as a guide.
                2. Cut green and red felt circles and free-form draw peppermint shapes on each. Cut along the lines to create the peppermint 'swirl' pieces.
                3. Glue the swirls to the white circles. I found that regular Elmer's glue worked best - though be careful with the amount so you don't soak through the felt.
                4. Once your felt peppermints are ready, it's time for the tulle 'wrapper.' Cut a square of tulle large enough that it wraps around the peppermint like a taco (with the open seam to the center back of the peppermint) and you have at least 6 inches of overhang on each side. It's better to leave too much on each side than too little - you can trim later.
                5. As you make your peppermint tulle tacos, pin them to the onesies. At the end of this, all of your onesies should have peppermints pinned in the middle with the tulle in a rectangle form (open seam of tulle tucked between the peppermint and the onesie) and about 6 inches of overhang of tulle on each side.
                6. Get out your sewing machine and white thread, and sew around the edge of each peppermint so that in one swoop you sew both the peppermint and the tulle to each onesie.
                7. Use scraps of tulle to tie the overhang of tulle fabric on each side of the onesies, creating the little tuft of 'wrapper.' Trim the tulle to your liking.
                8. Ask all of the parents to bring something white or khaki for the bottom - tights, pants, etc.
                9. Have a big glass of wine.
                10. Done! *


                * On a trip to Target I came across some cute peppermint bags and mistletoe headbands in the $1 bin. In this case, I pushed the 'easy button' and gladly paid $22 for headpieces and bags (which I filled with bells and sewed shut) to outfit the whole class.

                Sunday, December 2, 2012

                Winter Squash-a-Paloooza

                Last year was the first we planted butternuts in the garden and - 5 vines and more than 30 squash later - we learned our lesson about this plant's abundance. The season was one big "Iron Chef" episode in our kitchen, with nearly every week's meal plan incorporating winter squash. I earnestly clipped recipes from magazines and newspapers, searching for inspiration. Soups, stews, salads, purees, roasted sides, pastas and desserts - you name it, we tried it.


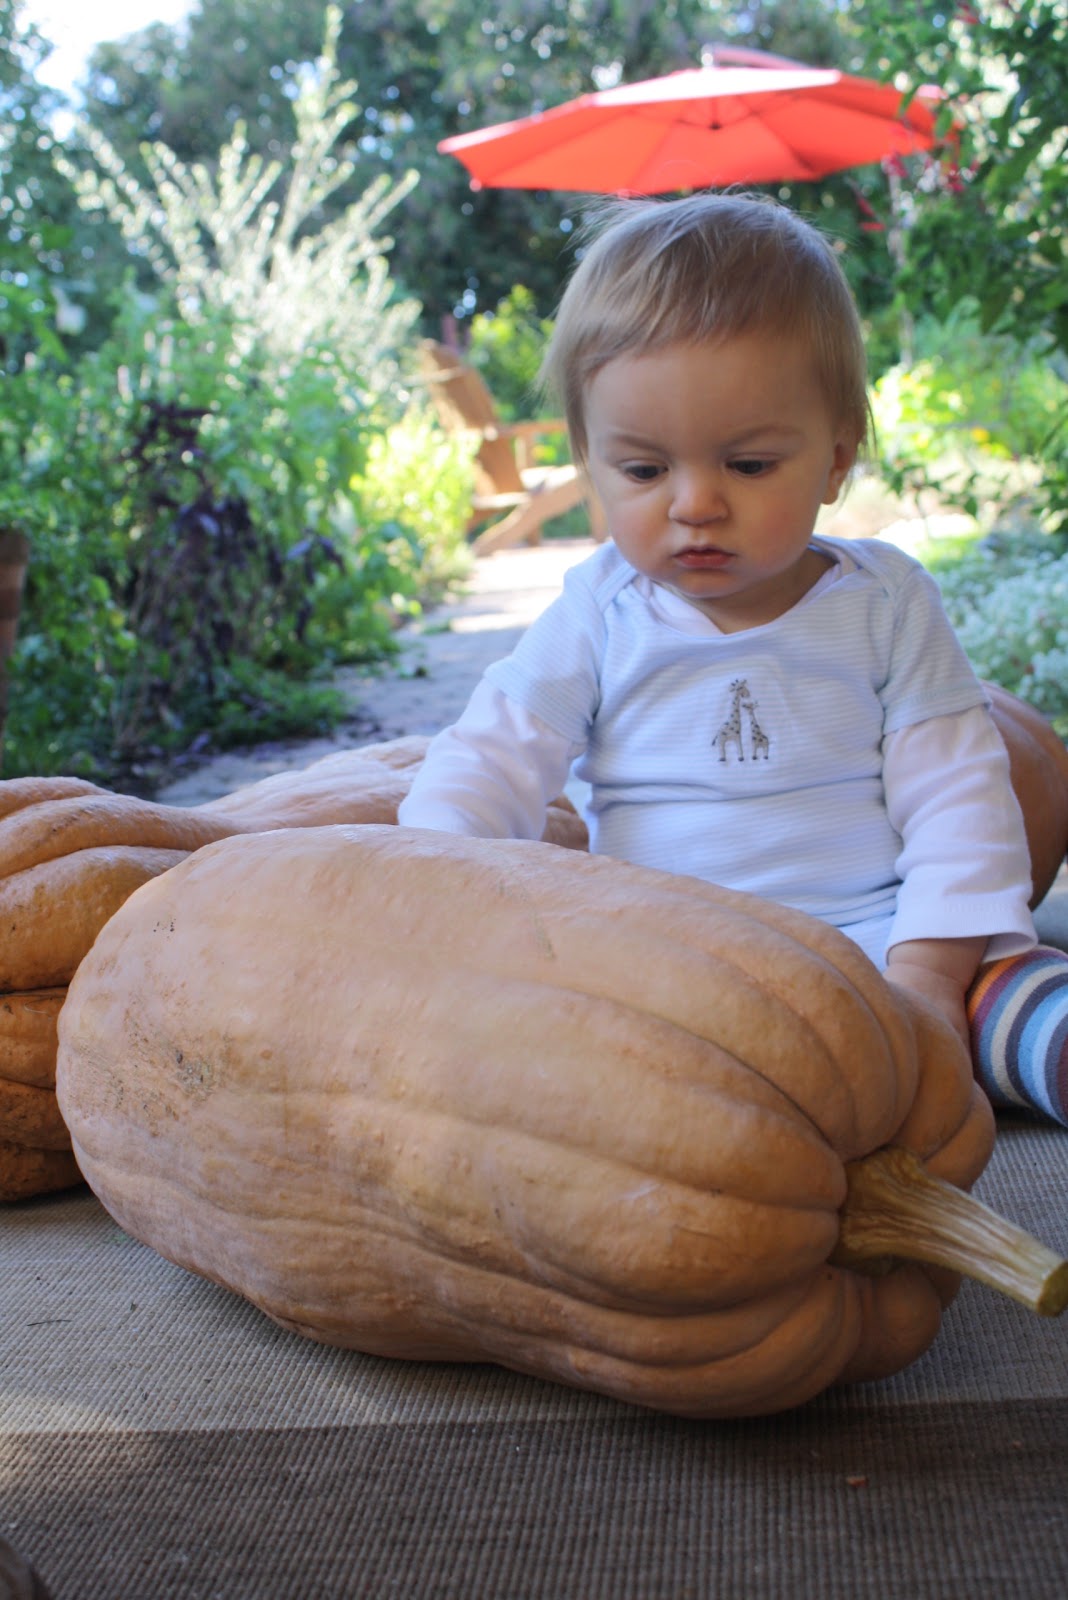
                This year we planted only two vines and tried a new variety - Rogosa Violina vs. the traditional Waltham - resulting in a much lower yield but some mammoth specimens. Although there was a time when the thought of yet another squash dinner made me want to head for the hills - or at least the nearest restaurant - I'm enjoying dusting off what are now tried-and-true recipes and reintroducing this hearty seasonal ingredient to our dinner table.

                Winter Squash Soup
                Serves 8
                Adapted from Gourmet

                This soup is so simple and is utterly delicious. We omit the cream nearly every time as the soup has tons of flavor and a lovely texture without it.

                1/4 cup ( 1/2 stick) butter
                1 large onion, finely chopped
                4 large garlic cloves, chopped
                3 14 1/2-ounce cans low-salt chicken broth
                8 cups 1-inch pieces peeled winter squash, any variety (about 3 pounds)
                1 1/4 teaspoons minced fresh thyme
                1 1/4 teaspoons minced fresh sage

                1/4 cup whipping cream

                Melt butter in large pot over medium heat. Add onion and garlic and sauté until tender, about 10 minutes. Add broth, all squash and herbs; bring to boil. Reduce heat, cover and simmer until squash is very tender, about 20 minutes.

                Working in batches, puree soup in blender. Return soup to same pot. Stir in cream; bring to simmer. Season with salt and pepper. (Can be made 1 day ahead. Chill. Rewarm over medium heat before serving.)

                Enchiladas with Spicy Pumpkin Sauce
                Makes 12 appetizers or 6 entrees
                Adapted from Catherine Bergen, C Casa

                Everyone in Napa knows that the best place in town for tacos and Mexican fusion fare is C Casa. When I saw this recipe in our local paper, I knew I had to try it. We were not disappointed - the blending of flavors is outstanding. I've never been so happy to have leftovers!

                For sauce:
                4 cups pureed organic pumpkin (two 15-ounce cans) or any winter squash
                2 1/2 cups chicken or vegetable stock
                1 jalapeños, chopped
                6 large cloves garlic
                3-4 Tbsp. curry vindaloo (depending on how spicy you want it)
                1 tsp. sea salt
                Puree above ingredients until smooth.

                For filling:
                3 cups shredded chicken, duck or pork
                4 cups goat cheese and Oaxacan cheese (we use all goat cheese)
                1/2 cup chopped green onions
                Mix cheese with green onions.

                12 white corn or flour tortillas

                Possible Condiments:
                Lime crema (Mexican sour cream with fresh lime juice)
                Cilantro
                Green onions
                Toasted pumpkin seeds
                Micro greens
                Sea salt

                To assemble:

                Preheat oven to 425 F. Cover one large baking dish with olive or grapeseed oil spray. Pour enough of the sauce to generously cover the bottom of the baking dish.

                Lay the tortillas flat. Add the protein of your choice. (You can also just do cheese enchiladas; in that case, use 5 cups of the cheese mixture.) Top the meat with some of the cheese mixture, then roll each tortilla tightly and place in baking dish, seam side down.

                Pour the rest of the sauce over the enchiladas and top with remaining cheese. Cover with foil and bake for 30 minutes or until bubbling hot all the way though.

                To serve, place one or two enchiladas in the center of a salad or dinner plate. Top the enchiladas with micro greens and toasted pumpkin seeds, then drizzle with lime crema. Finish with sea salt.

                Barley Risotto with Winter Squash
                Serves 4
                Adapted from Real Simple

                Last winter when we were working through our mountain of squash - and had a newborn baby - my Mom helped me whip up this risotto for dinner. Every ingredient needed was already in the kitchen (my litmus test for a good recipe) and the result was hearty and delicious.

                2  tablespoons  olive oil
                small winter squash (about 11/2 pounds)—peeled, seeded, and cut into 1-inch pieces (about 3 cups)
                onion, finely chopped
                kosher salt and black pepper
                1  cup  pearl barley
                1/2  cup  dry white wine
                3  cups  low-sodium vegetable broth
                5  ounces  baby spinach
                1/2  cup  grated Parmesan (2 ounces), plus more for serving
                1  tablespoon  unsalted butter

                Heat oven to 400° F. Heat the oil in a Dutch oven or large oven-safe saucepan over medium-high heat. Add the squash, onion, ¾ teaspoon salt, and ¼ teaspoon pepper and cook, stirring often, until the onion begins to soften, 4 to 6 minutes.

                Add the barley to the vegetables and cook, stirring, for 1 minute. Add the wine and cook, stirring, until evaporated, about 1 minute. Add the broth and bring to a boil; cover the pot and transfer it to oven. Bake until the barley is tender, 35 to 40 minutes.

                Stir in the spinach, Parmesan, and butter. Serve with additional Parmesan.

                Sunday, November 11, 2012

                Tricks of the trade from 'Be Thifty' and 'Living Well on a Shoestring'


                During one of my mid-day walks with Will, we headed to the library to find some good reading material on how to start a family while cutting back financially. While I didn't find exactly what I was looking for (maybe I should take a stab at writing a guide myself...), I did find a few good books on frugal living that I brought home and devoured from cover to cover. From olive oil hair treatments to reusing vacuum bags, below are some of the best tips that I've either implemented or filed away for future use.

                Be Thrifty: How to live better with less, Pia Catton & Califia Suntree (2010)
                I really enjoyed this book - I even bought it after returning the library's copy, and goodness knows that's saying something. (I found it used on Amazon - did you know there are warehouse deals via Amazon that are eligible for free $25 super saver shipping? Always click on the 'used book' option to see what you can find.) It was an easy read and I found myself dog-earing just about every page. Some of the new things we are doing in our home include:
                • Cutting my husband's hair. We bought a $20 Wahl clippers from Amazon and I've cut his hair for 6 months now. That's already a savings of at least $80 given he used to have his hair cut every six weeks. After getting over his initial fear of being my next DIY project, I think he secretly likes it...no hassle to get to the barber shop anymore. And honestly? No one can tell the difference.
                • Cooking more often with dried beans, which are SO much cheaper (and more delicious!) than their canned counterparts. There is a great chart with some quick tips for soaking and cooking different types of beans, including a quick soak method I've already used a few times when I've forgotten to soak beans overnight (put beans in water, bring to a boil, cover and turn off heat and let soak for an hour). I used to have no luck with beans - they would be one of two extremes, burned or rock hard - but with the help of this book I've managed to overcome my bad bean karma.
                • Making our own cleaning supplies. I've been using vinegar and water for a while now on my countertops, but after reading this book and articles in Natural Home and Urban Farm magazines, I've been inspired to switch up my whole cleaning regimen and go the natural (and cheap) route. This weekend I'm picking up washing soda, Borax, grapefruit essential oil and other supplies at the store. Let the experimenting begin (and let's hope that there are no explosions).
                Living Well on a Shoestring, by the editors of Yankee Magazine (2000)
                It's pretty amazing how many things have changed since this book was written in 2000 - for example, cell phones, online shopping, and streaming movies. Although it was quaint reading about inexpensive ways to store floppy disks and VHS cassettes, I enjoyed all of the ideas as I could tell they were written by a kindred spirit. Some of my favorites (for the 21st century) include:
                • Leftover rice? Make rice pudding.
                • If you get paid bi-weekly, twice a year you will get three paychecks in a month. Instead of allowing that third one to get eaten up by expenses, as soon as you receive it put it into a savings account or allocate it towards one of your goals.
                • Put a small spray bottle with detergent in the bathroom to start treating clothes when they go in the laundry (vs. spending extra money on Shout or another stain pre-treater)
                • Make facecloths from old t-shirts
                • Make a hot oil treatment for hair: Empty out a travel-size shampoo bottle and fill with olive oil. Drop into a hot bath to warm. Put on hair for 10-15 minutes under a shower cap.
                • Make a heart-shaped cake from 1 8-inch square pan and 1 8-inch round pan (cut round cake in half and add to two adjacent sides of the square)
                • Turn old Christmas cards into a paper chain for decorating - cut the fronts into thirds, make into loops and create a chain (I love this idea - so fun for kids!)
                • Make a garland of dried citrus slices
                • Child gift idea: Find a small wooden chair at a garage sale, spray paint and stencil their name on the back
                • Reuse your vaccum bag (I'm in the midst of trying this out). When bag is full, cut a slice in the side and empty into the trashcan (p.s. a messy endeavor). Seal with duct tape and reuse for one more cycle
                These are just a few of the 'pearls of wisdom' I gained from these two books. If you are of thrifty mind, I am sure you would find the time reading them to be well spent!

                Wednesday, November 7, 2012

                Bringing crochet, and Yoda, back from the '70s

                This being my son's first Halloween, I was inspired to try my hand at crafting his costume. It needed to be cute but not girly (my husband quickly vetoed a lamb) and, of course, inexpensive. After much scouring of Pinterest, I came across the perfect idea - Yoda. My husband loved the Star Wars theme and the key element of the costume - the hat - presented the perfect opportunity to dig my crochet hook out of the black hole it had fallen into.

                Channeling the force...
                I headed to my local yarn store (Yarns on First in Napa) and found the perfect shade of green yarn in the sale bin for $7.00. After a trip to the fabric store for some cream and brown felt for a coat and belt - for a grand total of $1.29 - I had all of the materials necessary to channel the 'force' and transform our little guy into Yoda.

                The coat and belt were ridiculously easy - I cut a square of cream felt to wrap around him like a jacket and made two slits for arm holes. The belt was one long piece of brown felt cut about 1.5'' thick.

                The hat was another story. I hadn't touched a crochet project in at least five years and the prospect of reading a pattern - let alone figuring out how to single/double/half-double crochet again - was a little daunting.

                Somewhere along the line I discovered Ravelry, an online community of crocheters and knitters where ideas, projects and patterns are shared. After signing up for a free account, I searched for "Yoda hat" and came across a few patterns that offered me a starting point. I picked out two - here and here - that had the look I was going for and didn't appear too complex.

                I then sat down with the yarn, a 6.5mm crochet hook, my two patterns, the Crocheter's Companion (a good investment on my part years ago), said a little prayer for patience, and started crocheting.

                After many failed attempts (my prayer for patience must have been answered), I ended up with a hat that I'm very happy with. It's a little big and certainly not perfect, but was a manageable project for a novice crocheter. I used elements of each pattern for the final result and made changes along the way as I remembered how to wield my crochet hook. Below is the 'bastardized' pattern that resulted, along with some instructions that I would have found helpful the first time around. I thank the ladies that wrote the original patterns for guiding me along the way!


                Yoda Hat

                Begin by making a magic loop (watch this YouTube video for a how-to)
                Row 1: 10 dc (double crochet) in the magic loop. Join with 1 sl st (slip stitch) in the first dc.
                Row 2. Ch 3. Increase by making a cl (cluster stitch) in every dc from the previous row.
                Row 3. [1cl, 1dc] (this means repeat the pattern 1 cl, 1dc, 1 cl, 1dc, 1cl, 1dc, etc. for the entire row)
                Row 4: [1 cl, 5dc] (same as above, repeat the pattern in the brackets for the entire row - 1cl, 5dc, 1cl, 5dc, etc.) 
                Row 5: [dc] Repeat row 5 until the hat is large enough.

                Yoda Ears
                Start with an 8-10 inch tail for sewing ear onto cap.
                1. Chain 16, dc in 2nd ch from hook and continue down the chain. Ch 3 & turn.
                2. dc in each dc across, ch 3 and turn. Repeat this row so that you have a total of three rows that are all the same length.
                3. On the fourth row, sctog (this means skip) the first 2 dc, dc to the 2nd from last dc.  Sctog the last 2 crochet, ch 3  & turn (this will make the end of your ears into a triangle shape - in a nutshell, you are reducing the length of the row by 2 on each side as the triangle narrows). Continue until the ear naturally completes as you get to the end of the triangle. 

                Attaching the Ears

                Using the 8-10 inch yarn tail you left when you started the ear, begin by sewing that through the very bottom of the ear and then pulling the yarn tight so that you 'gather' the ear - this will create the cone shape at bottom of the year. Tie off the yarn so that the ear stays in that cone shape.  At that point, simply place the ears on either side of the head and use the remaining yarn to sew onto the cap. Trim any long ends and sew into the cap. You're done!

                Monday, October 29, 2012

                Scones that even I can't screw up

                In our home, Sunday morning always finds me in the kitchen with a cup of tea, enjoying the task of whipping up breakfast from whatever I can find in the pantry. Usually we end up with pancakes (the Lemon Pancakes from the Joy of Cooking are one of my all-time favorites), waffles, or crepes with fresh fruit. What do these recipes have in common? Well, for starters, they don't involve my oven.

                The jury is still out as to whether it's my fault or the oven's fault that I can't bake, but suffice it to say that the last time I made a pie there was fire involved. However, in a flury of energy one Sunday morning, I decided I would throw caution to the wind (though not the fire extinguisher) and try my hand at scones.

                Like pancakes or waffles, you probably have everything you need in your pantry and fridge to make a batch of scones. I came across the following recipe after Googling 'best scones' and I must admit, it lives up to the search criteria. I think the secret is the sour cream - well, I know so as I tried it once with yogurt and it just wasn't the same. You can make them your own by throwing in dried cranberries, grated lemon peel and poppy seeds, currants, or whatever suits your fancy!

                Easy-Peasy Scones (adapted from this recipe)

                1 3/4 cups all-purpose flour
                4 teaspoons baking powder
                1/4 cup white sugar
                1/8 teaspoon salt
                5 tablespoons unsalted butter
                1/2 cup dried currants, raisins, or cranberries
                1/2 cup milk
                1/4 cup sour cream
                1 egg
                1 tablespoon milk

                Preheat the oven to 400 degrees F (200 degrees C).

                Sift the flour, baking powder, sugar and salt into a large bowl. Cut in butter using a pastry blender or rubbing between your fingers until it is in pea sized lumps. (Or, use your food processor to mix in the butter. If its frozen, you'll need to use the blade. Make sure to pulse gently and not over mix.) Stir in the currants (or other addition). Mix together 1/2 cup milk and sour cream in a measuring cup. Pour all at once into the dry ingredients, and stir gently until well blended (or, pulse gently in food processor). Overworking the dough results in terrible scones!

                With floured hands, pat scone dough into balls 2 to 3 inches across, depending on what size you want. Place onto a greased baking sheet, and flatten lightly. Let the scones barely touch each other. Whisk together the egg and 1 tablespoon of milk. Brush the tops of the scones with the egg wash. Let them rest for about 10 minutes.

                Bake for 10 to 15 minutes in the preheated oven, until the tops are golden brown, not deep brown. Break each scone apart, or slice in half. Serve with butter or clotted cream and a selection of jams - or even plain.